
Executing tests from Azure DevOps
As an alternative to executing tests from TestArchitect, TestArchitect test cases and test modules may be executed from Azure DevOps.
Ensure that the following requirements are met:
Your TestArchitect repository is configured to connect with Azure DevOps Services. (Learn more.)
Map the TestArchitect project containing the test cases to an ADO project. (Learn more.)
Map the TA test cases to ADO test cases. (Learn more.)
Install the Team Foundation Server Plug-in for TestArchitect Client. (Learn more.)
To execute test from ADO1, carry out the following steps:
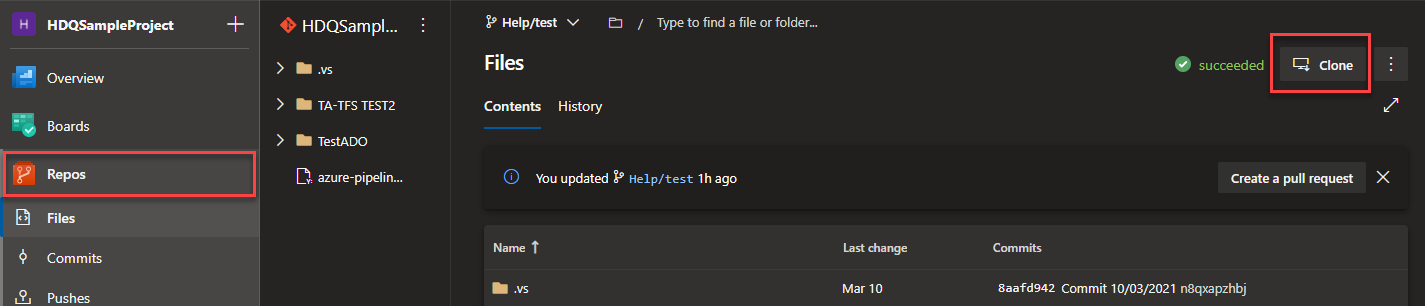
Clone the ADO Repository to your machine
- Login to your Azure DevOps repository. Then naviagate to the Repos tab and click the Clone button
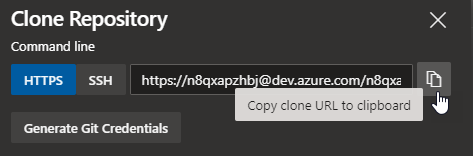
- Then click Copy clone URL to clipboard button
- Create a new folder in your personal computer. Then clone the Repository above to this folder.
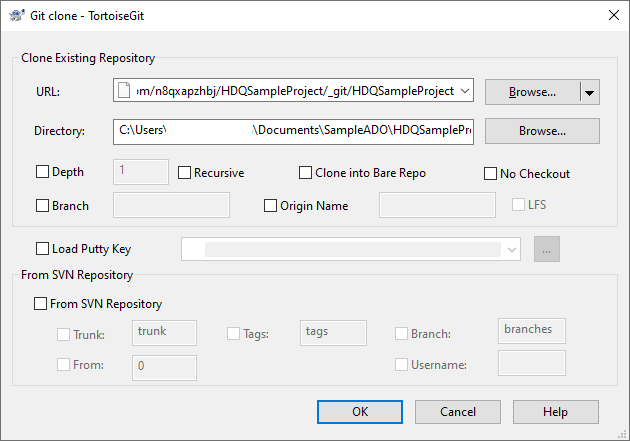 Enter the branch name if you want use the another branch beside
 master.
- Login to your Azure DevOps repository. Then naviagate to the Repos tab and click the Clone button
Create TA-ADO Integration Project in Visual Studio
- Launch Visual Studio (supported versions: 2015, 2017, 2019)
- Select File -> New -> Project from the menu bar.
- Select TA-ADO Integration Project and click Next
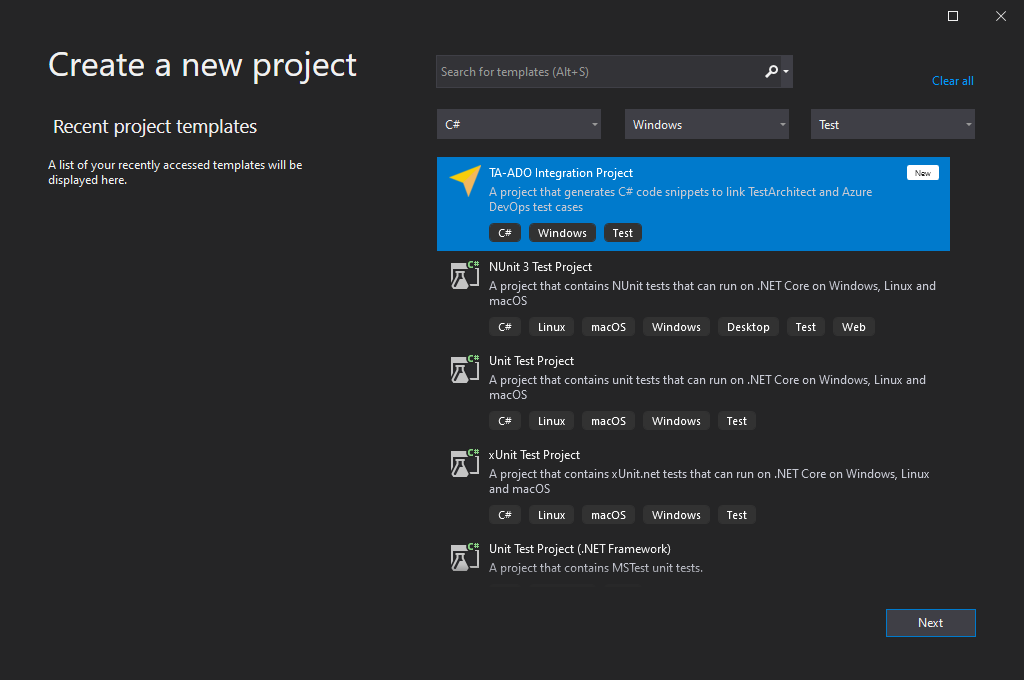
- Enter your project’s name and location you already cloned the source from in step 1
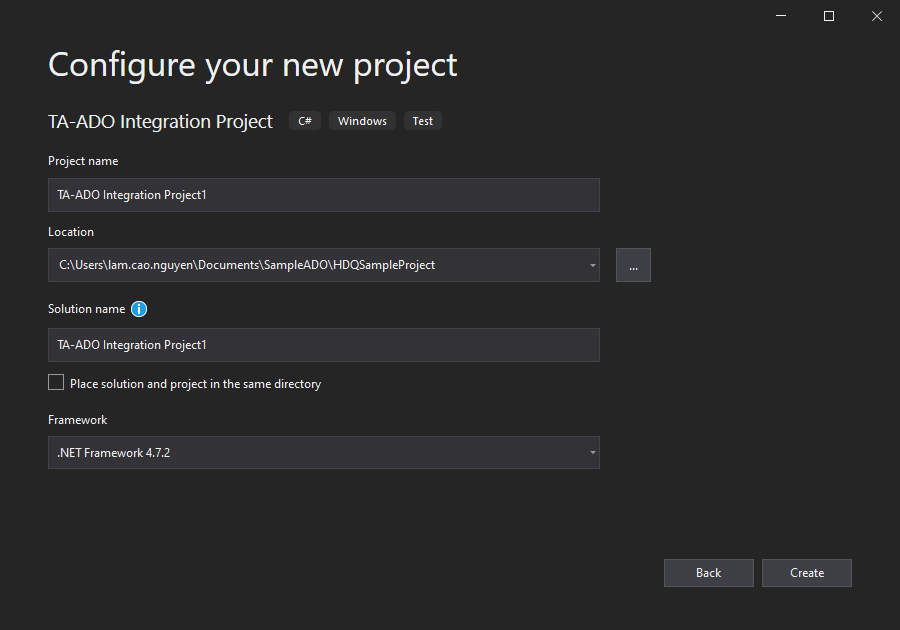 Note: If your version has two options, Create directory for solution and Create new Git repository, please check them both. Finally, click Create button
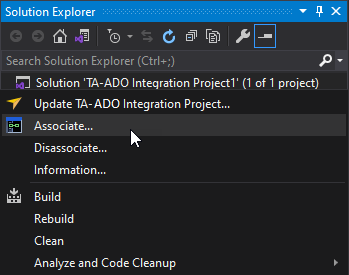
Associate the tests between Visual Studio and Azure DevOps
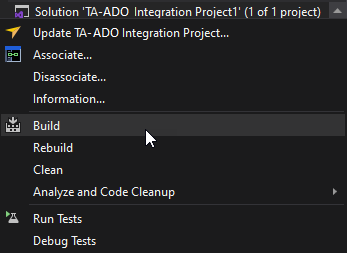
- Right click on your created project and select Associate
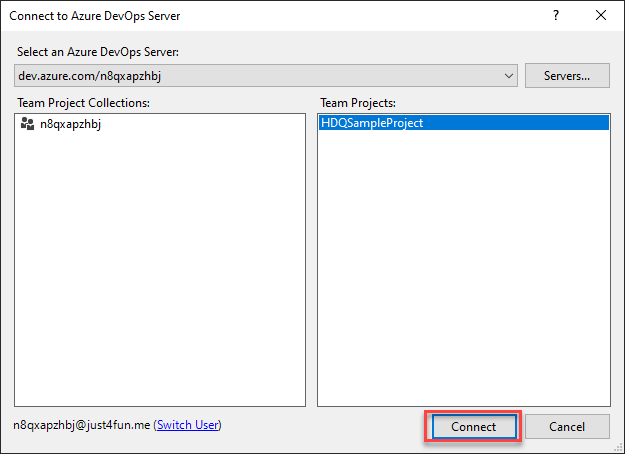
- If you have not registered the server, the Connect to Azure DevOps Server dialog will open and ask you enter the server information. Click the button Server… to browse the server.
- If you register a new server, VS will require you to authenticate with the server using your credentials.
- After successfully connecting to the server, the Connect to Azure DevOps Server dialog will display. Now you can select your team’s project and click Connect
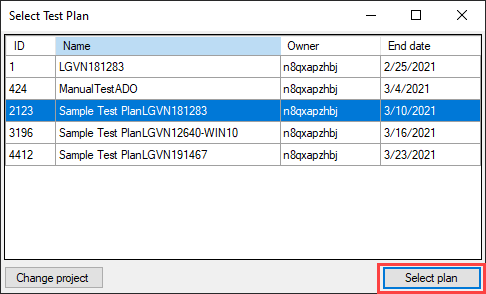
- Now the Select Test Plan dialog will appear. Select your Test Plan and click the Select Plan button
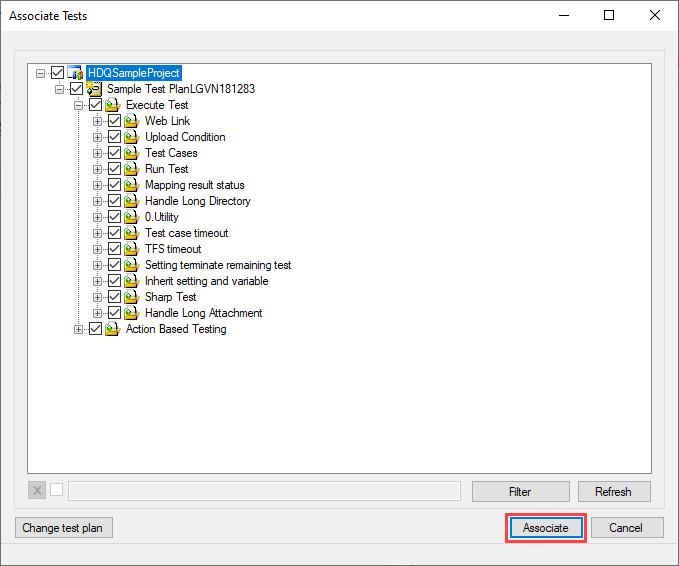
- In the Associate Tests dialog, you can select the test cases you want to execute. Then click the Associate button
- Right click on your created project and select Associate
Build your project in Visual Studio
- Right click on your project in Visual Studio and select Build
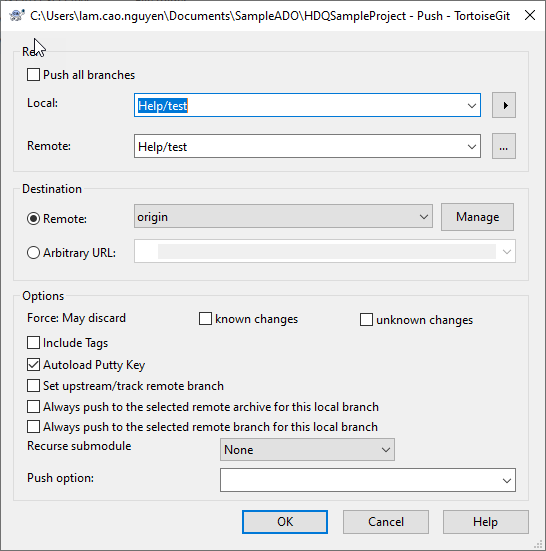
- After successfully building your project, you need to push your work to the ADO server.
- Right click on your project in Visual Studio and select Build
Install Agent pool
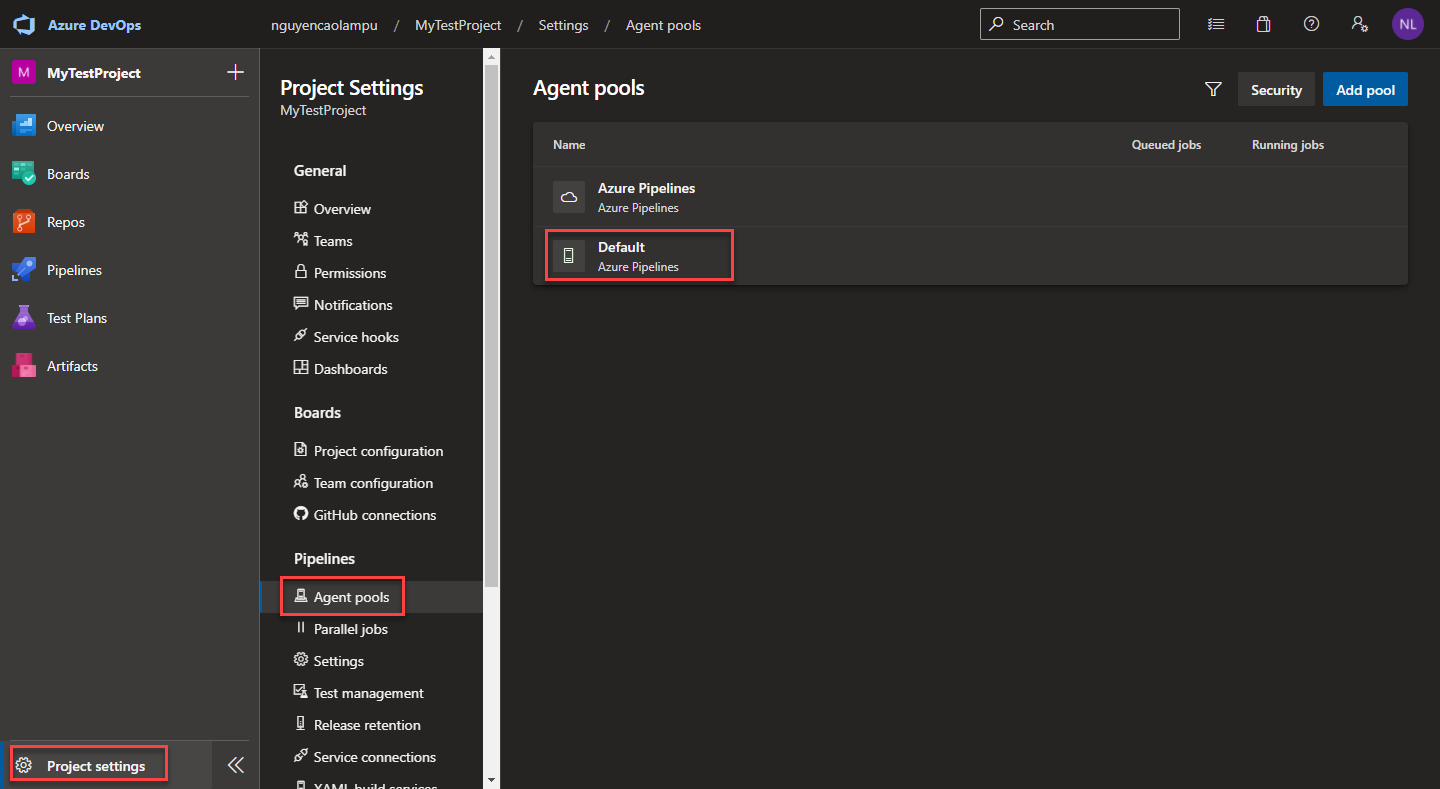
- Open Azure DevOps server. Then select Project Setttings -> Agent Pools -> Default as below:
- Click New agent

- Follow the ADO agent installation guide.
 Notes:You need to use Windows PowerShell to run these commands. Additionally, while installing an agent, Azure DevOps will ask for personal access token to authenticate with the ADO server. Click here to learn how to get an ADO personal access token.
 - After following the guide above, your powershell should look like the image below:
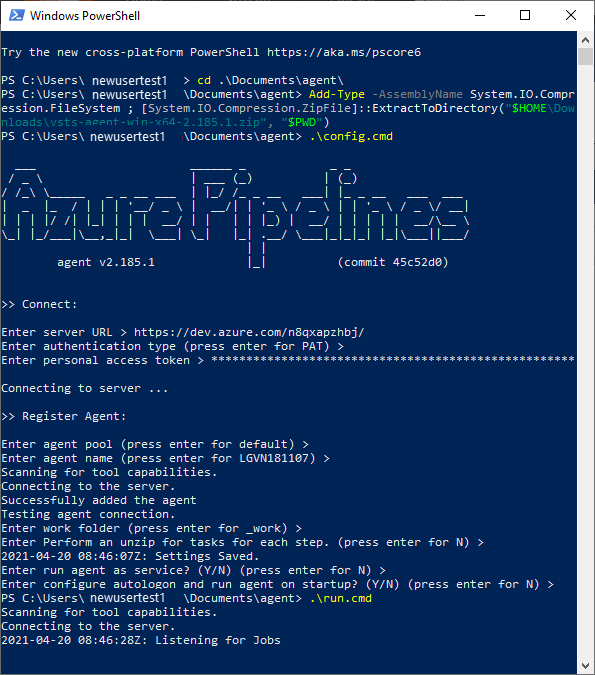 Important:Do not close the PowerShell window!
- Open Azure DevOps server. Then select Project Setttings -> Agent Pools -> Default as below:
Create a Pipeline
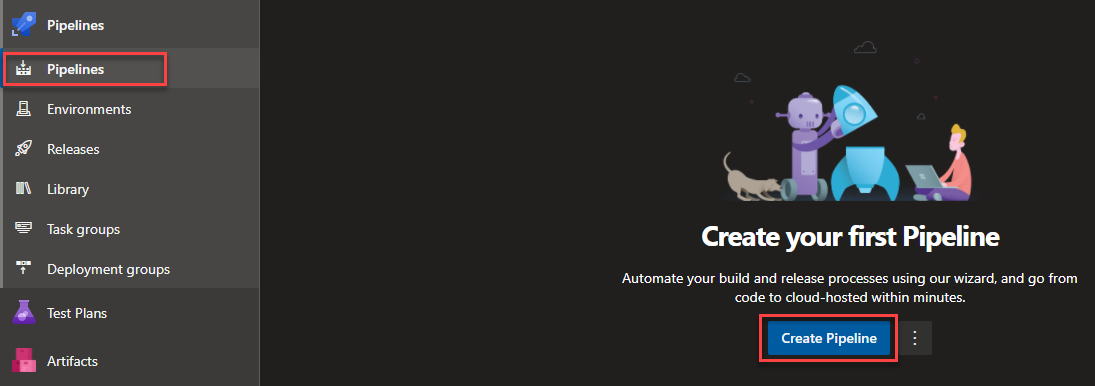
- Open Azure DevOps server
- Select Pipelines -> Create Pipeline
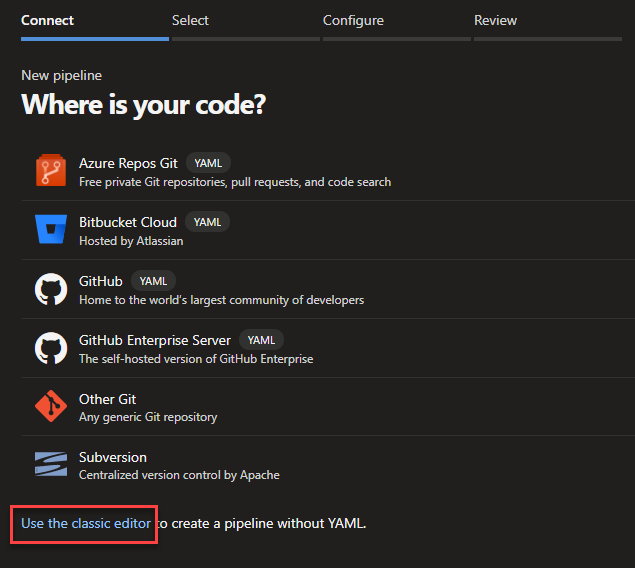
- Then select Use the classic editor
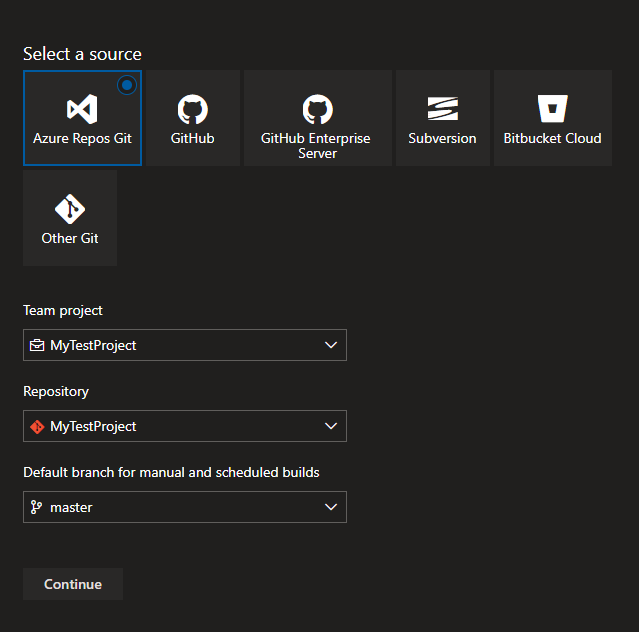
- Select Azure Repos Git. Then select the project and branch you want to use and click Continue.
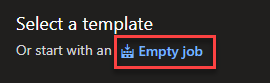
- Next, select Empty job
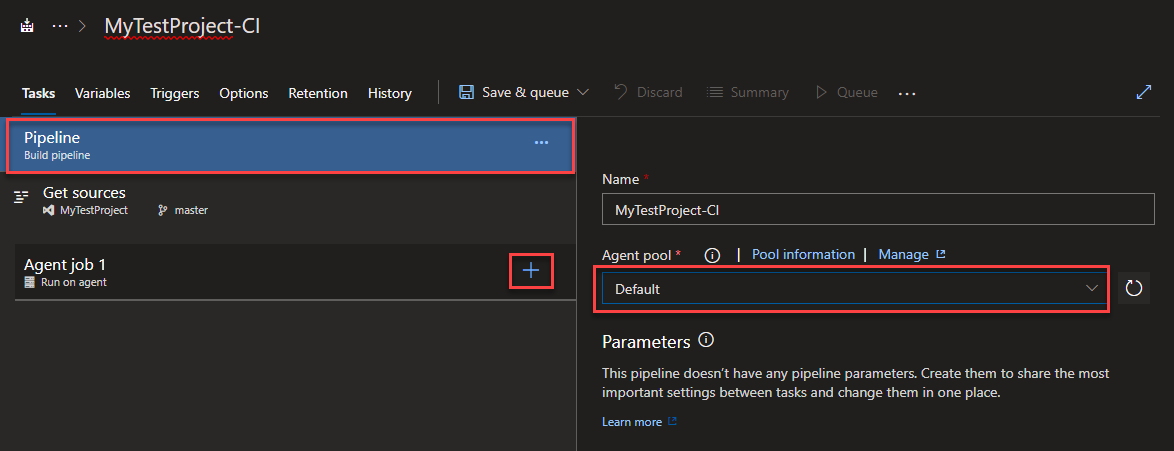
- Select Pipeline, then select Default in the Agent pool select-box. Next, click the plus(+) button next to the Agent job.
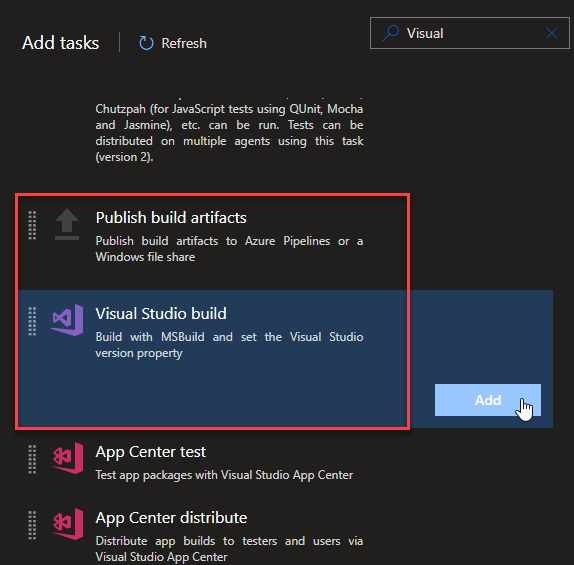
- Add Visual Studio Build and Publish build artifacts tasks.
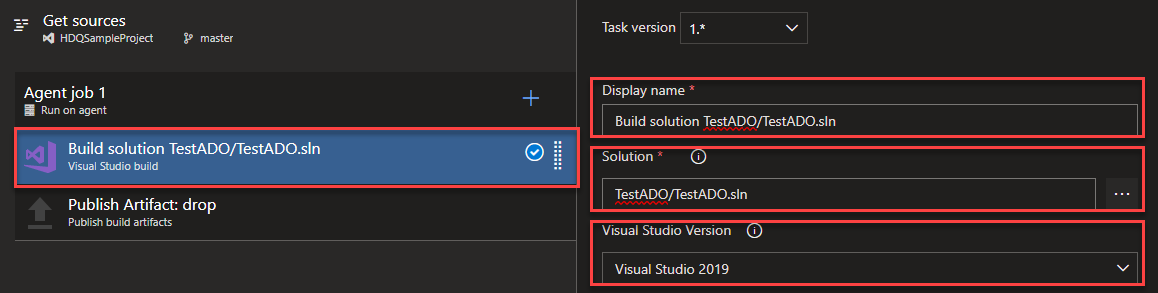
- For the Visual Studio Build, click on the Build Solution tab. Then enter your Display name and select the solution you already built in step 4 for the Solution field. Finally, select Visual Studio 2019 in Visual Studio Version select box. You can leave the default values for the remaining fields.
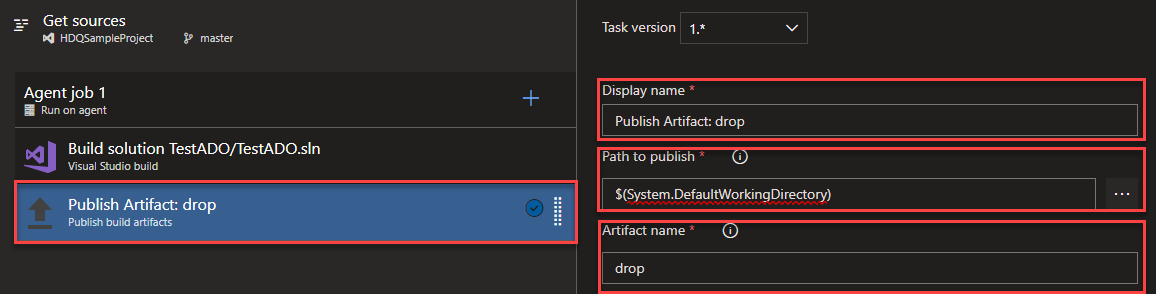
- For Publish build artifacts, click on the Publish Artifact tab. Then enter your Display name and Artifact name. Then enter $(System.DefaultWorkingDirectory) for Path to publish field. You can leave the default values for the remaining fields.
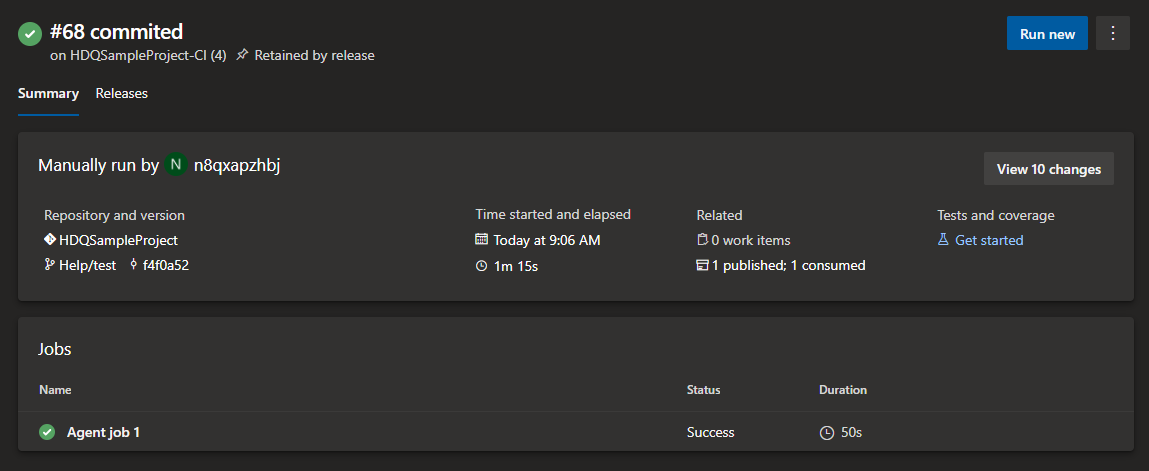
- Click Save & queue after you’ve fnished. If you’ve successfully completed the steps above it should look like this
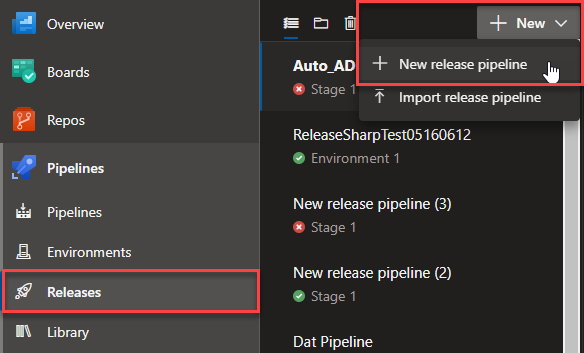
Create a release
- Open Azure DevOps server
- Select Releases -> New -> New release pipeline
- Next, select Empty Job
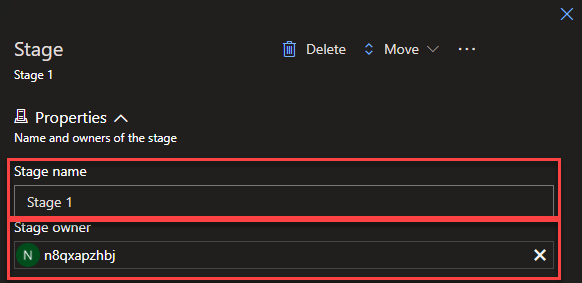
- Then enter your Stage name and select the Stage owner
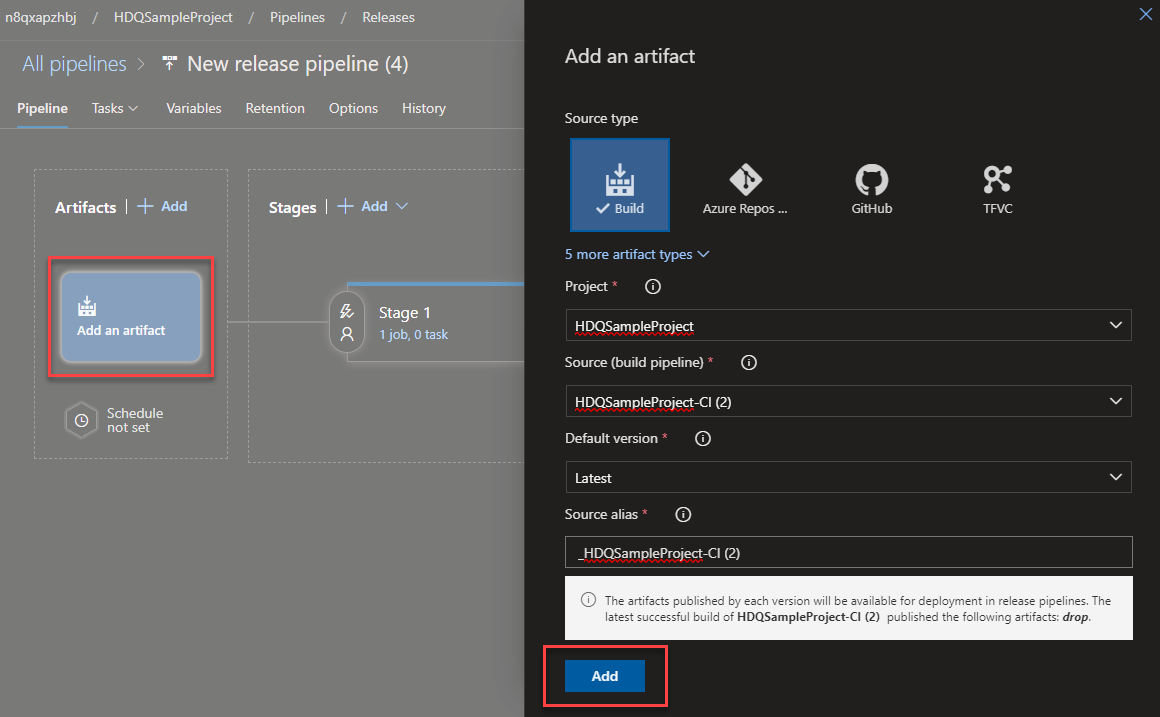
- Next, select Add an artifact and click the Add button
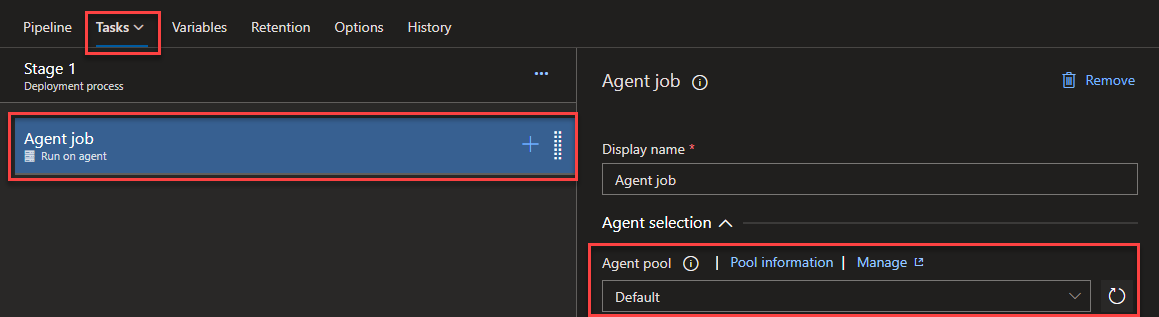
- Navigate to the Tasks tab. Click on Agent job and change the Agent pool to Default
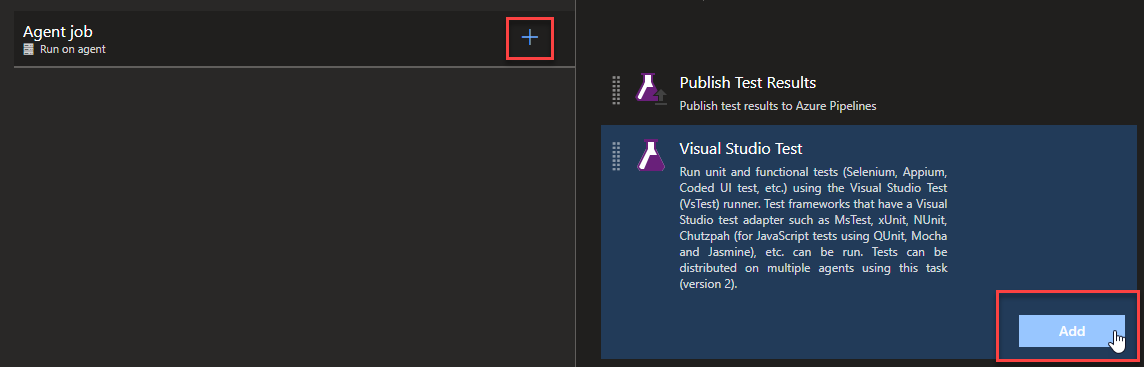
- Then click on the plus button next to Agent Job and add Visual Studio Test
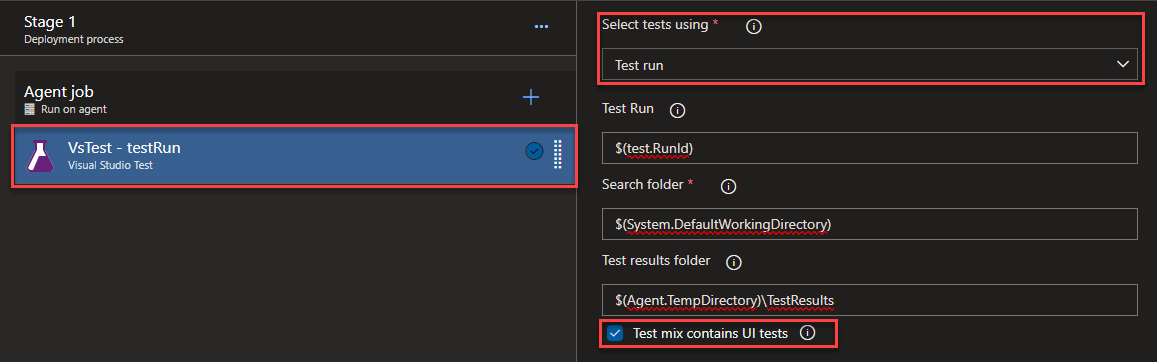
- Click on VsTest - testRun. Then select Test run in the Select tests using field and check the Test mix contains UI tests option.
 Finally, click Save to save your work and move on to the final step.
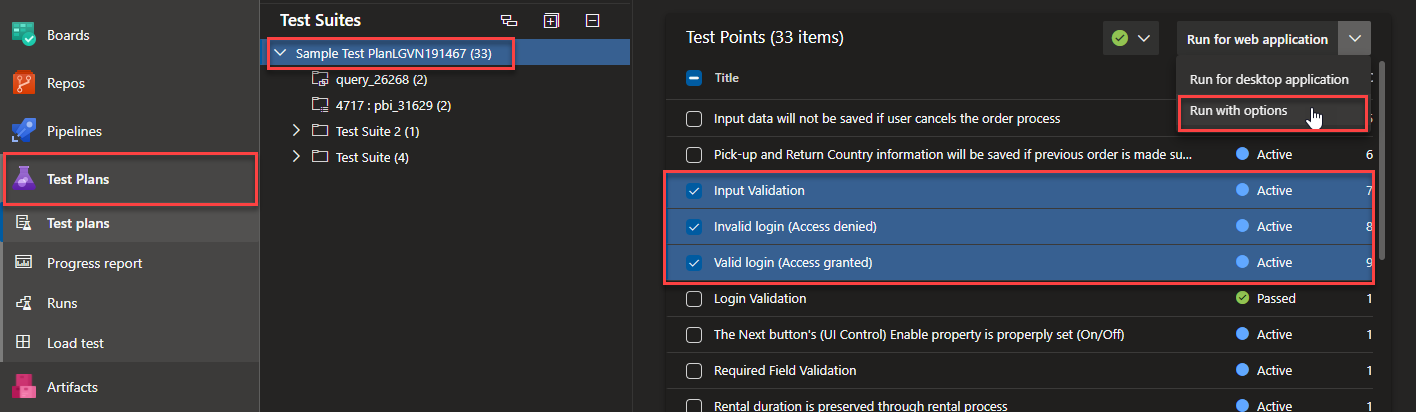
Execute a test
- Open Azure DevOps server
- Select the Test Plan you already associated with your test cases and navigate to the Execute tab. Now, you can choose the test cases you want to execute. Then select Run with options
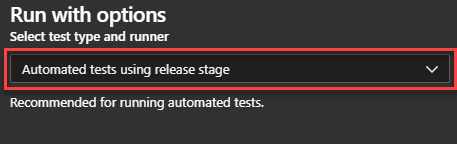
- In the Run with options dialog, select Automated tests using release stage in Select test type and runner select box.
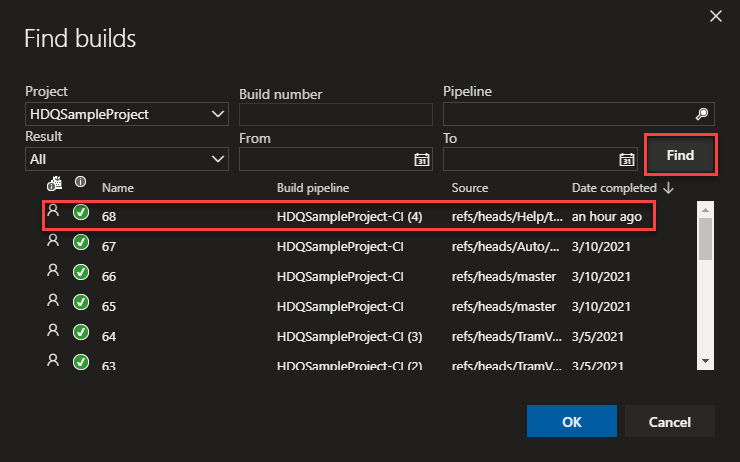
- Then select the build you already queued in step 6 by clicking the … button.
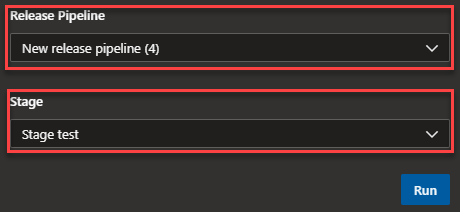
- Next, select the Release pipeline and Stage you created. Then click Run.
Now your selected test cases will execute.
Note: If it is the first time you’ve executed tests using ADO, the TA Scheduler dialog will appear and require you to enter the Repository and License Server information.
ADO: Azure DevOps ↩︎
