Uploading TestArchitect test modules/test cases to Azure DevOps
TestArchitect test cases and test modules can be uploaded to the Azure DevOps server, which also establishes one-to-one mappings between the two sets of test cases.
Ensure that you have already taken the following steps:
Your TestArchitect repository is configured to connect with Azure DevOps Services. (Learn more.)
Map the TestArchitect project containing the test cases to an ADO project. (Learn more.)
To upload TestArchitect test cases/test modules to ADO:
In the TestArchitect explorer tree, right-click the desired test node, test folder or test module to be uploaded.
On the context menu, select External Tool > Visual Studio > Upload to Azure DevOps Services.
In the Upload to Azure DevOps Services dialog box, locate the target folder in ADO to which you want to upload the tests.
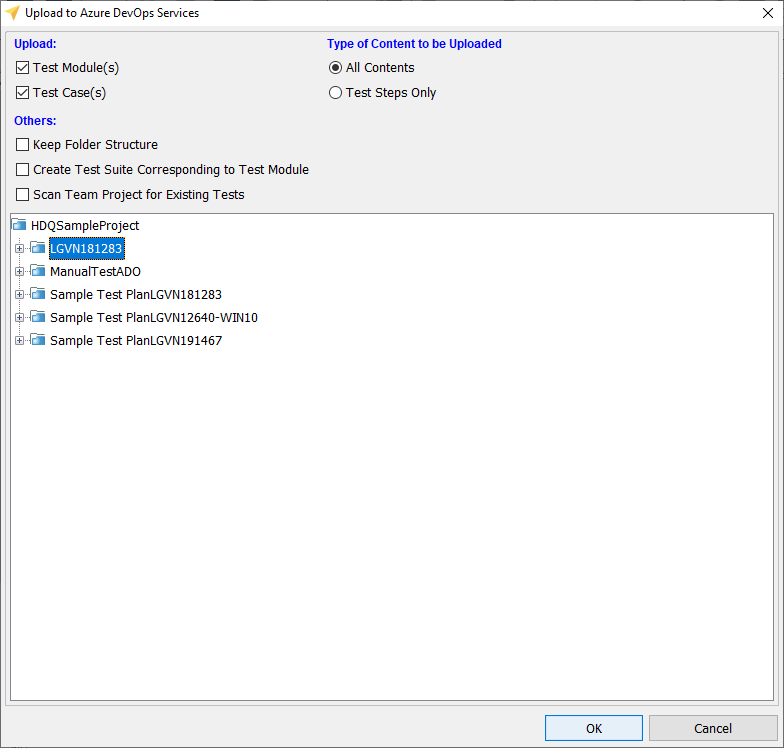
Select the preferred options:
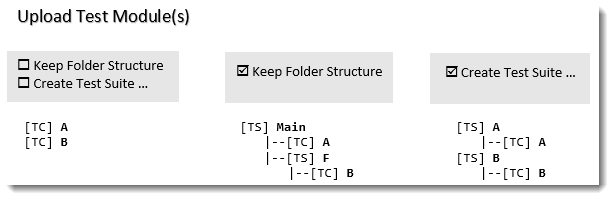
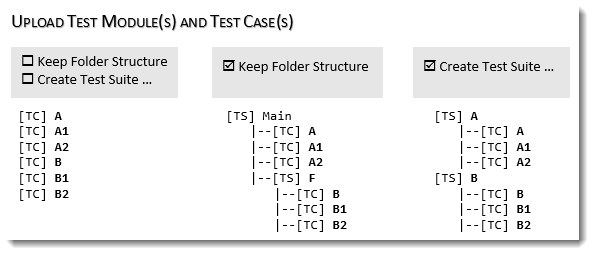
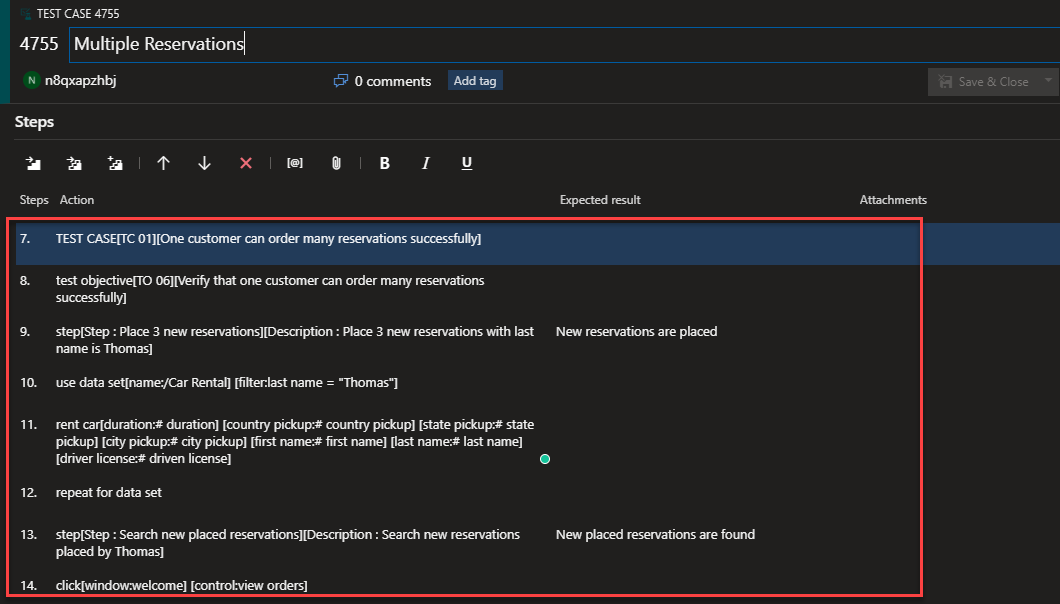
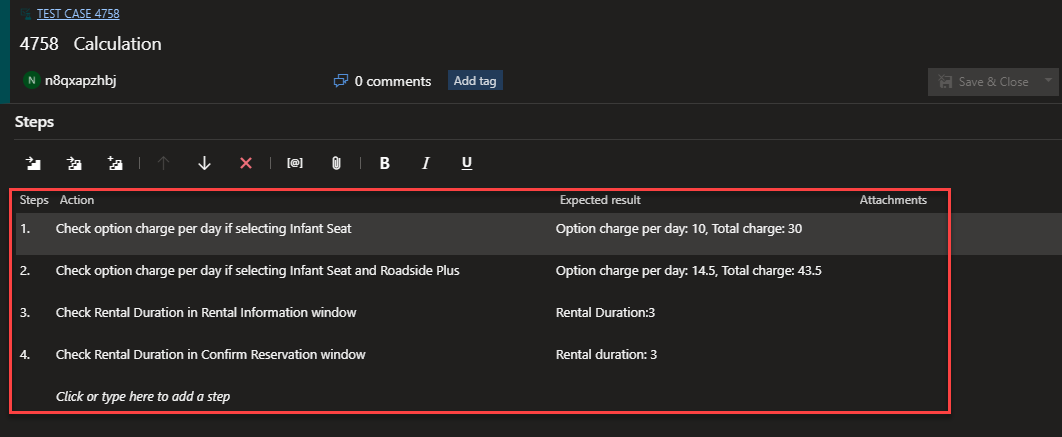
Test Module(s): Create a test case in ADO corresponding to each TestArchitect test module to be uploaded. The ADO test cases will bear the names of the TestArchitect test modules.
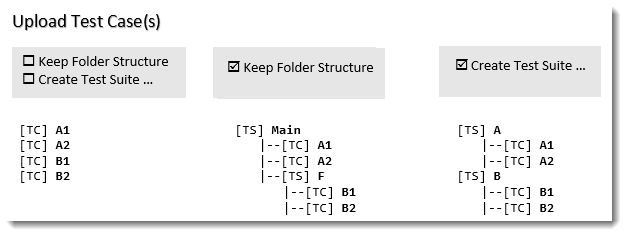
Test Case(s): Create a test case in ADO corresponding to each TestArchitect test case to be uploaded. The ADO test cases will bear the name of the TestArchitect test cases.
All Contents: Upload all contents of the TestArchitect test cases/ modules to the ADO test cases.
Test Steps Only: Upload test steps of TestArchitect test cases/ modules to ADO test cases.
Keep Folder Structure: Organize the uploaded tests in ADO in a similar way to those in TestArchitect. A folder in ADO will turn into a test suite in TestArchitect.
Create Test Suite Corresponding to Test Module: Create a test suite in ADO corresponding to each TestArchitect test module; then upload the test module and its test cases to Azure DevOps Services as test cases in the test suite.
Scan Team Project for Existing Tests: If selected, the whole ADO project will be scanned for test cases that already exists. Otherwise, the selected test node will be scanned.
Click the OK button.
The Confirm Overwriting dialog box appears, showing a list of test cases that already exists in ADO if any. Select the check boxes for the ADO test cases that you want to overwrite with TestArchitect test cases/ test modules. Click the OK button.
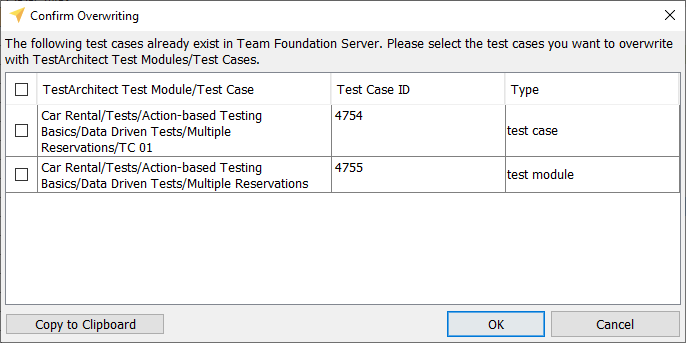 Notes:the Copy to Clipboard button is used to copy the list of existing test cases to the clipboard.
An information dialog box will appear stating “Upload process completed successfully” if the upload was successful. Click the OK button.
Assuming you upload tests with the structure below in TestArchitect: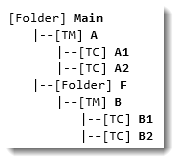
The corresponding tests in ADO will be organized as follows: