Creating a test module
Test development and execution are based on test modules, which consist of test cases and test objectives.
Test cases with similar scope are grouped together to form a single test module. Test objectives inform the reader of the functionality and purpose of the test. Auditors can quickly gain insight into the goals of a test from the test objectives.
When you create a new test module for your project, TestArchitect automatically overlays it with a template, consisting of four sections: OBJECTIVES, INITIAL, TEST CASE, and FINAL. (Note that, while TestArchitect only populates your new file with a single TEST CASE section, you can and should add as many such sections as are appropriate for the functional scope of the test module.) Place all relevant information about your test cases in the OBJECTIVES section. In general, it is recommended that every test case be linked to at least one test objective. Locate all initializing actions for the test module in the INITIAL section. Initializing actions are those actions, such as establishing test settings, launching the AUT, or logging into it, that must be performed before any of the “nitty-gritty” testing can take place. Place all the actual testing action lines in the TEST CASE sections. Finally, the FINAL section should contain all action lines to be executed at the conclusion of each test module’s run, such as various “housekeeping” actions.
Ensure that you are connected to a repository, and that it holds a project to which you want to add a test module.
To create a test module for a project:
Invoke the New Test Module dialog box by doing one of the following:
In the TestArchitect explorer tree, select any item within the current project, and then click the Create new test module
 button in the toolbar.
Fastpath: Ctrl + N
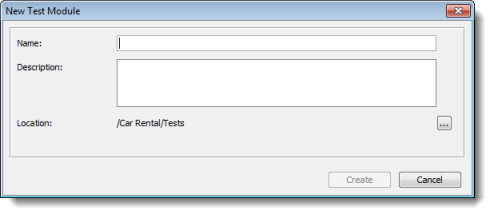
Alternatively, right-click either the Tests node or a test folder where the new test module should be created, and then select New Test Module. The New Test Module dialog box appears.

In the dialog box, specify the test module information:
- Name: The test module name.
- Description: (Optional) Short description for the test module.
- Location: (Optional) This field specifies where the new test module will reside. It is preset based on the current focus within the explorer tree. You can choose another location to store the new test module by clicking the
 button.
Click Create.
If the limit number of created tests modules is exceeded under your specific TestArchitect license, you will receive the following message:
The allowed number of created test modules has been reached under your license. However, you are still able to run automated tests with TestArchitect. To resolve this issue, please contact TestArchitect Support at [email protected] to upgrade your TestArchitect license to a higher tier.
Upon successful test module creation, TestArchitect opens the new test module worksheet in the main panel, with the Editor subtab selected. Under this tab you can see a a test module template with the predefined sections in which you can begin creating your test procedures. (Refer to The test editor for more information about editing.)
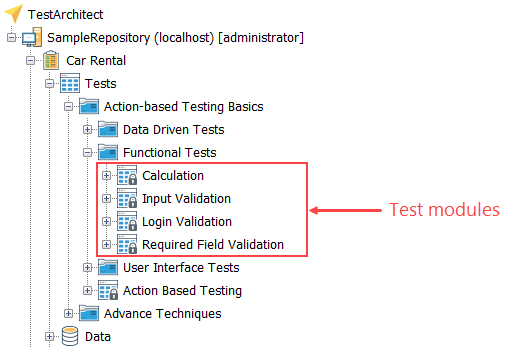
Additionally, in the TestArchitect explorer tree, a test module node is added to the appropriate spot under the project’s Tests node.
Note that, upon its creation, a test module is automatically checked out to you, meaning that others cannot make updates to it. Its node does immediately becomes visible to other users of the project. However, its contents – your test procedures – only become available to others once you have checked in the test module. Once check-in is performed, TestArchitect stores the test module’s contents to the repository database, and it is available for any other authorized user to check out and modify.
