
Web Recording in TestArchitect
With TestArchitect’s Web Recorder, user interactions with the target website are monitored and recorded in the form of keyword action lines. WebRecorder will automatically generate action lines and locators and send them directly to your test in real-time. This topic provides general information on the Web Recorder’s recording functionality.
Starting, pausing, and stopping recording
To start recording:
In TestArchitect, create a new test module or action definition, or open an existing one for editing. Check it out if needed.
Place the cell pointer on the line where the Web Recorder should insert the recorded action lines.
From the TestArchitect menu bar, select Tools > Web Recorder.
Fastpath: Alternatively, press CTRL+F6 on your keyboard, or click the Web Recorder
 button on the toolbar.
The TestArchitect Web Recorder dialog will open.
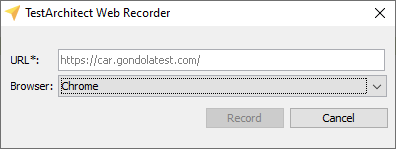
URL (Required): The URL of your website under test.
Browser(Optional): The browser used to record the test.
Notes:Currently, TestArchitect Web Recorder only supports Chrome.
Click Record button to start the Wed Recording session.
Any of these actions will start Web Recorder in recording mode and display the Web Recording toolbar at the lower right corner of the browser.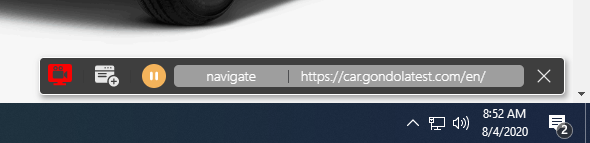
Using the buttons of this toolbar, you can control the recording process and perform various actions during the recording session.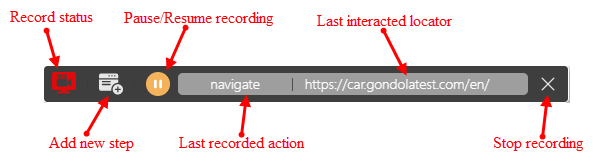
Record status: This icon shows the currents status of the recording tool. There are two possible statuses.
- Recoding
 : When a recording session is running, there will be a red pulsing icon.
 - Pause
 : When the recording session is paused, this icon will be white.
Additionally, sometimes the toolbar will obscure the webpage and you cannot interact with an element that is behind the toolbar. You can move the recording toolbar to another place by dragging and dropping the Record status icon.
Pause/Resume recording: To pause the recording, click the Pause recording ![]() button on the Web Recording toolbar. This allows you to perform other actions on your computer without generating action lines.
button on the Web Recording toolbar. This allows you to perform other actions on your computer without generating action lines.
To resume recording after a pause, click the Resume recording ![]() button.
button.
Stop recording: To stop recording, click the Stop recording ![]() button on the recording toolbar.
button on the recording toolbar.
Add new step: The Web Recorder records your user interactions as keyword-based action lines. It can also insert checkpoints into the recorded test procedure as needed. Follow the steps below to insert a checkpoint into your test.
Click the Add new step
 button to activate the insert checkpoint mode.
Now the insert checkpoints mode will turn on and it required you to select an element for insert checkpoint as below.

To help select the correct element, Web Recorder will highlight the element with a blue rectangle when you hover mouse over it.
The Add new step dialog will appear after you have selected an element.
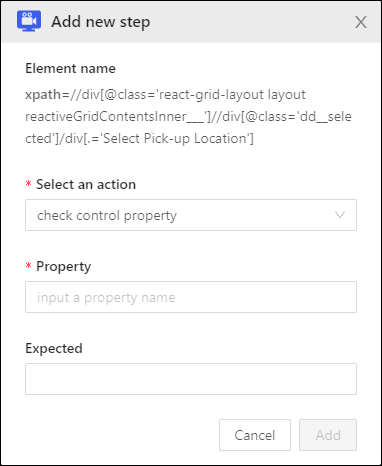
Element name: Display the locator of your selected element.
Notes:This locator will change to the Page Title if you choose check window exists in the Select an action combobox.Select an action: List of checkpoint actions.
Property: List of available properties of the control.
Notes:This field is enabled only if you choose check control property in the Select an action combobox.Expected: The value expected to be returned by the check.
Click Add button to add the action to the TestArchitect Editor.
Turn off the insert checkpoints mode. There are two ways to turn it off:
By pressing ESC.
Then click Resume recording
 button to continue record.
By clicking the Resume recording
button.Then the confirm dialog will display as below:
Click OK to turn off the insert checkpoints mode.
