
The requested page is not available for selected version.
Insert checkpoints while recording
The Mobile Recorder also allow to insert checkpoints during the test recording. To have the recorder record a check at a given point, follow the below steps:
Click the Add checkpoint button
 on the recording toolbar to activate the insert checkpoint mode.
Select an element to insert checkpoint.
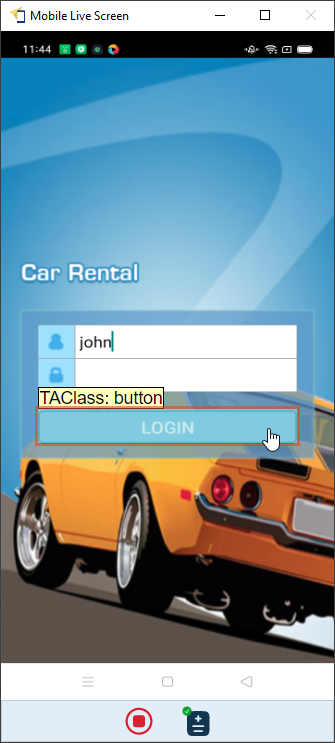
To help select the correct element, Mobile Recorder will highlight the element with a rectangle when you hover mouse over it. Additionally, a tooltip displaying the TAClass value will be shown.
Turn off the insert checkpoints mode by pressing the ESC key.Notes:Adding a checkpoint for an unknown-class control is not supported yet. You must map it to a known class before adding a checkpoint. (Learn more)The Add checkpoint dialog will appear after you have selected an element.
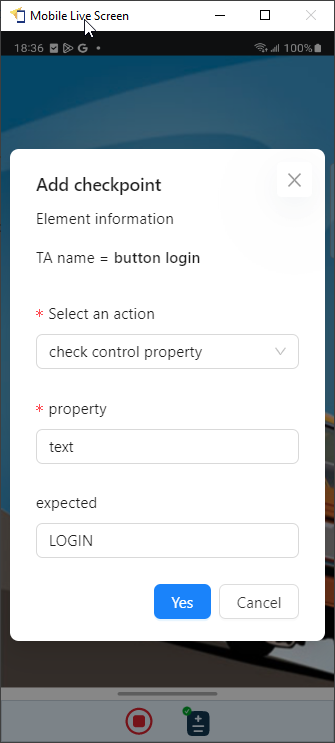
- TA name: Display the “ta name” of your selected element.
- Select an action: List of checkpoint actions.
- property: List of available properties of the control.
- expected: The value expected to be returned by the check.
Notes:- TA name will change to ‘win class’ of captured entity if you choose check window exists in the Select an action combobox.
- Property and Expected fields are displayed only if you choose check control property in the Select an action combobox.
Click Yes button to add the action to the TestArchitect Editor.
