
Creating a startup setting for a built-in setting
In addition to being modifiable from within your test procedures, built-in settings can have their values set by you just prior to the launch of your test run.
As with user-defined settings, you may use the Execute Test dialog box’s Startup Settings tab to also create new startup settings for built-in settings. Note the distinction, however: in the case of a new built-in startup setting, you are not creating a new built-in setting. Instead, the purpose of a built-in startup setting is to override TestArchitect’s default value for that setting. That is, the value you set for a built-in startup setting becomes the value of that setting at the start of execution of each affected test run.
To set a new value for a built-in setting from TestArchitect Client, carry out the following steps:
Launch the Execute Test dialog box.
Select the Startup Settings tab.
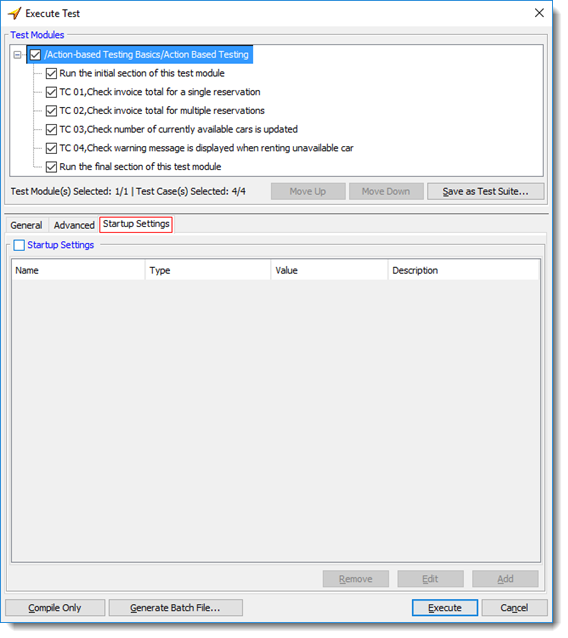
Click the Add button.
The Add a setting dialog box appears.
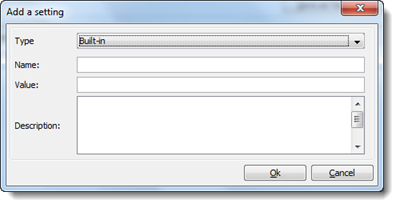
In the dialog box, enter the following information:
Type: (Required) Type of setting. Select the Built-in option.
Name: (Required) Name of the setting.
Notes:As you start typing a setting’s name into the Name box, Content Assist pops up an autocomplete list displaying valid built-in settings. If you continue typing, the list is continuously filtered down to those built-in settings that contain the entered sequence of characters.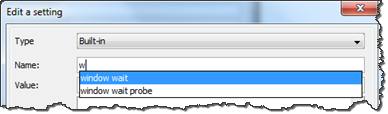
Value: (Optional) Value to be applied to the built-in setting at startup of the test run. Note that this value overrides the system default value of the built-in setting.
Description: (Optional) Short description for the built-in setting.
Click OK.
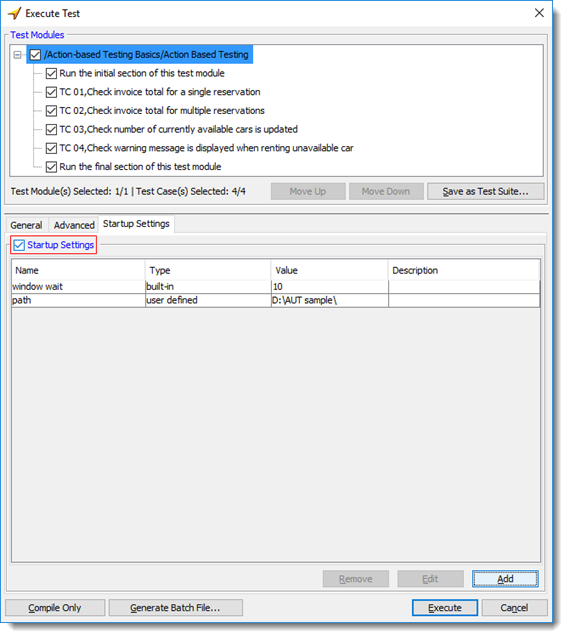
The built-in setting’s startup value is reconfigured and appears in the Startup Settings list.
Select the Startup Settings check box.
This enables all the setting assignments listed under the Startup Settings tab, so that all those settings are set to their specified values (in the Value column) when you click Execute.
The new value for the built-in setting takes effect when you click the Execute button, overriding the setting’s default value at the start of the test run. When the test run ends, built-in settings and their startup values are displayed in the test result.
If you choose to generate a batch file (learn more), the parameter /ss specifies the defined settings and their values. Multiple settings are separated with semi-colons.
