
Creating a data profile
In this activity, you will create a data profile.Data profiles are required by all Dashboard panels, to supply them with data and other settings.
Before proceeding:
- Ensure that you have a basic understanding of the TestArchitect Dashboard and its purpose.
- A Dashboard portal, connected to the Sample Repository, should be open in your browser.
A Dashboard panel, be it a chart, heat map, indicator or report, is driven by a data profile. A data profile specifies the source(s) of the data (one or two item of the connected repository), restrictions (in the form of filters) on how much of that data is used, and other settings that determine how the data is displayed in various contexts.
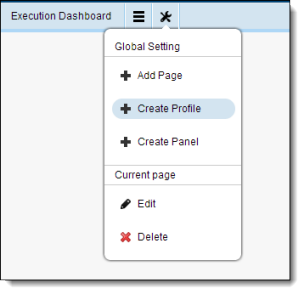
On the Dashboard tool bar, point to Global Setting and select Create Profile
On the General Settings page, enter the following information then click Next:
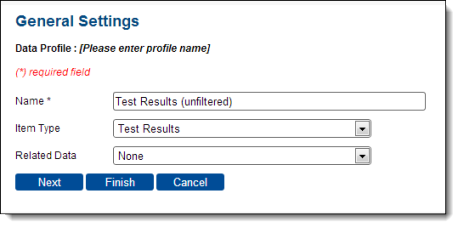
- Name: Test Results (unfiltered).
- Item Type: Test Results. This is the principal project item from which the data profile will obtain data.
- Related Data: leave this field blank.
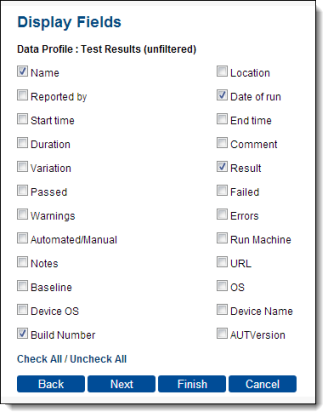
On the Display Fields page, select the check boxes for the fields Name, Build Number, Date of run, and Result, then click Finish.
Upon completion of the setup, the list of existing data profiles of the repository is displayed, with the new data profile included in the list.
What you have learned:
- How to create a Dashboard data profile.
- How to configure a Dashboard data profile for a specific data source.
