
Importing repositories
Exported repository (*.dat) files can be easily imported into another TestArchitect repository.
Ensure that the repositories of interest have been exported to files, and that you have access to those files from your host.
To import repositories, perform the following:
If not already running, open the Repository Server Control Panel dialog box.
Click Import Repository
 on the toolbar, or select Tools > Import Repository.
In the Open dialog box, specify the path to the .dat file to be imported.
Tip:You can select multiple repository files to import them in a single operation.Click the Open button.
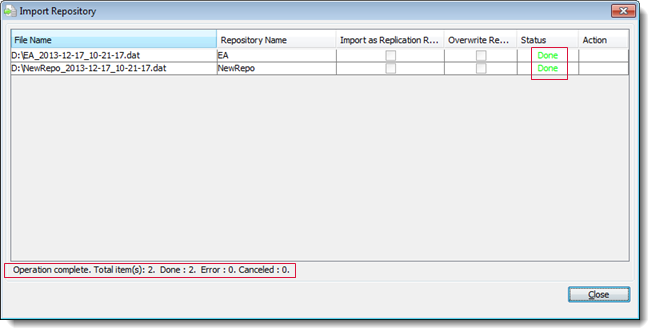
The Import Repository dialog box appears and displays information on the selected repository files in the Import Information list.

In the Import Repository dialog box, you have the following options:
Enter any name for the repository files in the Repository Name field, or use the default name.
Notes:A repository exported from a pre-7.3 version of TestArchitect may have an issue when imported into TestArchitect 7.3 or later, if the original repository name contained any underscore (_) characters. Please note that the suggested name in the Repository Name column may not accurately reflect the original name.To import repository files as replication repositories, see Importing a repository as an replication.
To overwrite existing repositories, select the Overwrite Repository check box. Before overwriting the repositories,stop the repository server.
Caution:Since overwriting a repository will cause you to lose the data in the existing repository, please inform your team members to ensure that no project modifications are made during the repository import process.
To remove a repository file that was selected in step #3, click Remove on the Action field.
Tip:You can select multiple repository files for removal by pressing your keyboard’s Shift or Control key.To import extra repository files, click the Add button, then repeat steps #3 through #4.
Click OK.
A status bar indicating the progress of the import is visible in the bottom left corner of the Import Repository dialog box.
Notes:If the status of the imported repository files is Error, please refer to Troubleshooting repository import.When the import process completes, a successful notification message replaces the progress bar in the status area. The successfully imported repositories display a status of Done.
Click Close to exit the Import Repository dialog box.
The imported repositories appear in the Repository List panel.
