Installing TestArchitect Agent onto Android devices
How to install TestArchitect Agent onto Android devices.
At the present time, installation to a physical device requires a USB cable connection to the host PC. (Hence, if working with a physical device that has not yet been set up for communication with the host PC, refer to the instructions given in Setting up a physical Android device via USB cable.)
Do the following to install the TestArchitect Agent onto your Android device:
With your physical Android device connected via USB cable, or emulator up and running, launch the Android Instrumentation Applications dialog box.
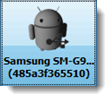
You should see a grey icon representing your device in the Devices panel on the Android Instrumentation Applications dialog box. A grey icon indicates that the device is visible to TestArchitect, but that the TestArchitect Agent is not yet installed.

Right-click the icon and select Install TestArchitect Automation Agent.
Fastpath: Alternatively, click the button Install TestArchitect Automation Agent on selected device
 , on the toolbar.
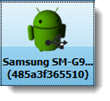
Upon successful installation, the device icon, formerly grey, becomes green. This indicates that the functioning TestArchitect Agent application now resides on your device.

Optional: You may remove the USB cable connection after you have installed the TestArchitect Agent onto the physical device that you intend to test.
In addition to the presence of a green icon in the Android Instrumentation Applications dialog box, you may verify that the TestArchitect Agent is running on a device by checking Android’s Manage Applications utility:
- On a device with Android 4.0 or higher, the Manage Applications utility is available under Settings > Applications manager.
- On a device with Android version lower than 4.0, the Manage Applications utility is available under Settings > Applications > Manage applications.

LogiGear Corporation
![]() Tel:
+1 (650) 572-1400
Tel:
+1 (650) 572-1400
![]() Email:
[email protected]
Email:
[email protected]