Defining your process for TFBuild
This topic describes how to define a process for TFBuild, also known as Build VNext. This new build is web- and script-based and highly customizable, providing those groups of steps that allow you to build your applications without needing to be concerned with tools or languages.
There are numerous ways to define the process to suit your organization’s needs. This guide describes the simplest way to create a build definition that, when queued, ensures that your test cases are automatically executed upon completion of the build. (Learn more.)
Create a Visual Studio Build.
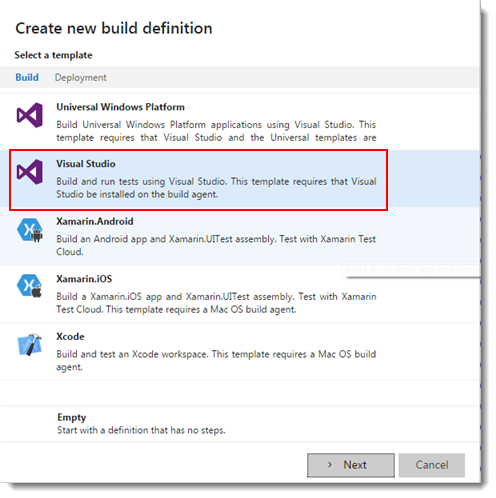
Add steps to specify what you want to build, which tests to run, and all those other steps needed to complete the process.(Learn more)
The following scenario offers a simplified example of the setup needed for a successful build defintion that allows for automatic testing of the completed build. Refer to the Microsoft documentation for a complete description of all involved parameters.
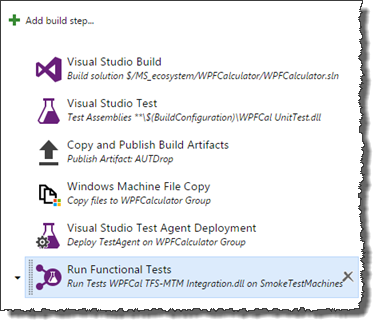
Build:
Visual Studio Build: Build with MSBuild and set the Visual Studio version property (Learn more.)
- Solution: Select the solution to be built.
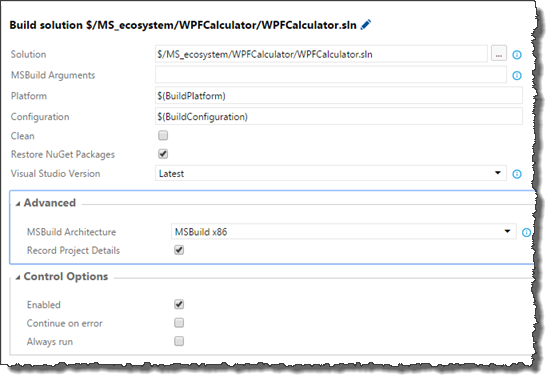
- Solution: Select the solution to be built.
Test:
Visual Studio Test: Run tests with the Visual Studio test runner. (Learn more.)
- Test Assembly: Set the appropriate filepath for the Test Assembly argument, according to your project. Example:
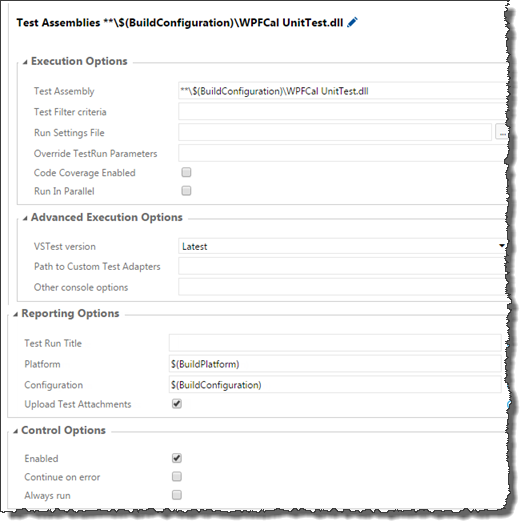
- Test Assembly: Set the appropriate filepath for the Test Assembly argument, according to your project. Example:
Utility:
Copy and Publish Build Artifacts: Copy build artifacts and the AUT, to a staging folder and then publish them to the server or a file share. (Learn more.)
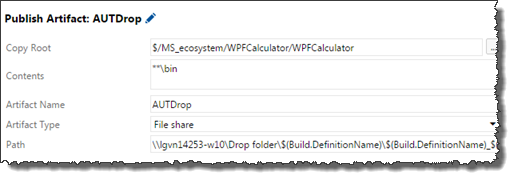
- Copy Root: Folder that contains the AUT files you want to copy.
- Contents: Specify **\bin to copy AUT files in any sub-folder named bin.
- Artifact name: Specify the name of the artifact, e.g., AUTDrop.
- Artifact Type: A dropdown list offers you options of where to have the artifact copied. Let’s select “File share” to have it copied to a file share.
- Path: As we’ve chosen to use a file share, we here specify the UNC file path to the share. Using variables, you can uniquely name the folder for each build. For example \\lgvn14253-w10\Drop fodler\$(Build.DefinitionName)\$(Build.BuildNumber).
Deploy:
Windows Machine File Copy: Copy files to remote machine(s) (Learn more.)
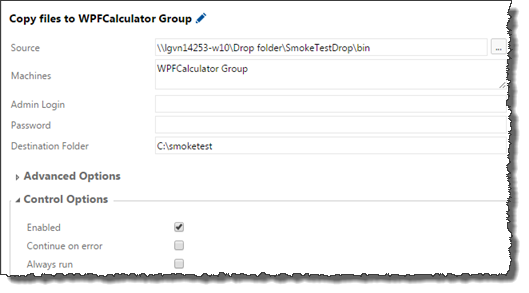
- Source: The source of the .dll files
- Machines: Name of the resource group specifying the Windows machines used to run remotely.
- Destination Folder: Filepath specifying the folder in each of the Windows machines to which the .dll files will be copied. Note that the folder must exist (i.e., you must create it manually). The build process will not create it.
Test:
Visual Studio Test Agent Deployment: Deploy and configure the test agent to run tests remotely on a set of machines. (Learn more.)
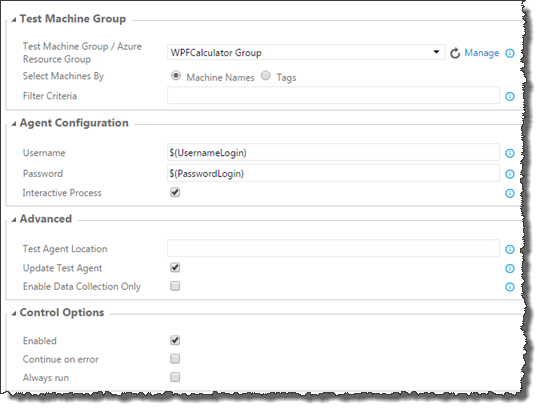
- Test Machine Group/Azure Resource Group: A list of the machines on which the test agent is to be deployed. In this example, we specify the name of a Machine Group. (Read here to configure a Machine Group for testing.)
- Username: The username that the test agent will use.
- Password: The password for Username.
- Interactive Process: This box should be checked. This is required for interacting with UI elements or starting applications during testing.
- Update Test Agent: If checked, and the test agent is already installed on the test machines, the task will check whether a new version of the test agent is available and, if so, install it.
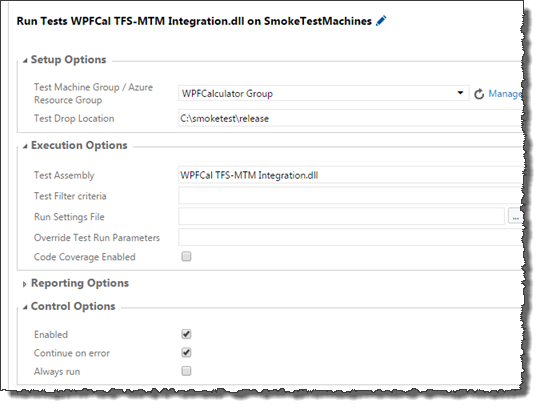
Run Functional Tests: Run Coded UI/Selenium/Functional tests on a set of machines using the test agent. (Learn more.)
Remember:This task must be preceded by a Visual Studio Test Agent Deployment task.- Test Machine Group/Azure Resource Group: A list of the machines on which the test agent is to be deployed. In this example, we specify the name of a Machine Group. (Read here to configure a Machine Group for testing.)
- Test Drop Location: The location on the test machine(s) where the test binaries can be found, having been written there during the Windows Machine File Copy phase.
