 Getting started
Sample Repository
Car Rental mobile
Testing Car Rental on the Android platform
Car Rental Android configuration
Getting started
Sample Repository
Car Rental mobile
Testing Car Rental on the Android platform
Car Rental Android configuration Installing TestArchitect Agent on Android device
Installing TestArchitect Agent on an Android device is the first step in setting up the test environment for Android application testing.
Ensure that the following basic requirements are met before installing TestArchitect Agent on a Android device.
- You have installed the necessary USB driver for your Android device on the host machine.
- A USB cable is available to connect the Android device to the host machine.
Perform the following procedures on the host machine with the USB cable connected to the Android device:
Enable Android device to execute applications from unknown sources by enabling the Unknown sources option. (On a device with Android 4.0 or higher, this option is accessed in Settings > Security; on a device with an Android version lower than 4.0, go to Settings > Applications)
Note:Enabling the Unknown sources option instructs Android not to reject applications that come from sources other than the Google Play Store.Enable the USB connection between the Android device and the host machine. (On a device with Android 4.0 or higher, enable the USB debugging option in Settings > Developer options. On one with an Android version lower than 4.0, enable USB debugging in Settings > Applications > Development)
When you connect a device running Android 4.2.2 or higher to your computer, the system displays a dialog box asking whether to accept an RSA key that allows debugging through this computer. Click OK.
Tip:To skip this dialog box in the future, select the Always allow from this computer check box.Note:This security mechanism protects user devices because it ensures that USB debugging and other ADB (Android Debug Bridge) commands cannot be executed unless you are able to unlock the device and acknowledge the dialog box.In TestArchitect Client, click Tools on the toolbar and select Android Instrumentation Tool.
An Android Instrumentation Tool dialog box appears displaying a list of connected devices in the Devices panel.
In the Devices panel of the Android Instrumentation Tool dialog box, right-click the icon representing the connected Android device and select Install TestArchitect Agent from the context menu.
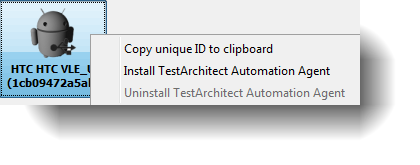
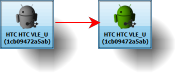
A message box appears to indicate whether or not the agent was installed successfully. Upon successful installation, the robotic Android figure on the Android device icon representing the connected device turns from grey to green.
After installing the TestArchitect Agent on the Android device, the TestArchitect Agent icon is displayed on the device’s desktop.
